
Elementor Widget Part 1: Setting Up the Development Environment
# Introduction
This first part sets up the local WordPress, WooCommerce and Elementor environment for the Collection Products widget.
# Learning Objectives
By the end of this tutorial, you will:
- Have a working WordPress installation
- Install and configure WooCommerce
- Install and activate Elementor
- Set up Hello Biz theme with a child theme
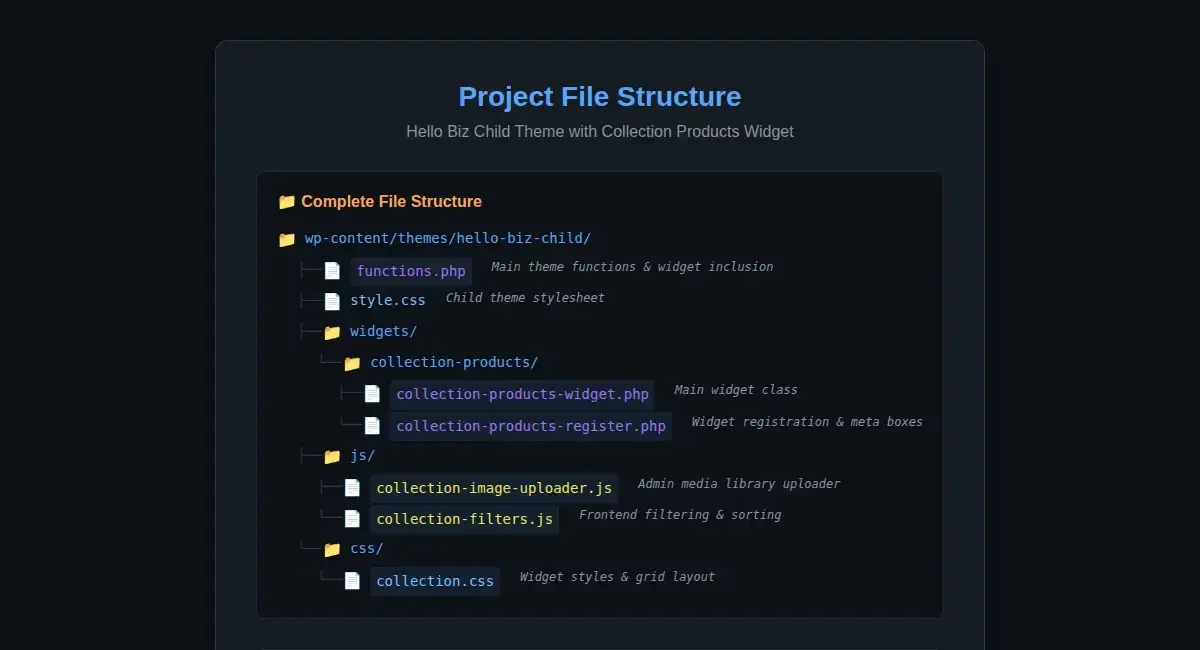
- Understand the child theme file structure
- Create the basic directory structure for the widget
# Prerequisites
- Local development environment (XAMPP, MAMP, Local by Flywheel, or similar)
- Basic understanding of WordPress installation
- Text editor or IDE (VS Code, PHPStorm, Sublime Text, etc.)
- FTP/SFTP client (optional, for remote development)
# Step 1: WordPress Installation
# 1.1 Install WordPress
If you don’t already have WordPress installed:
- Download the latest version of WordPress from wordpress.org
- Create a new MySQL database for your WordPress installation
- Extract WordPress files to your web server directory
- Navigate to your site URL in a browser
- Follow the WordPress installation wizard:
- Enter database details
- Create an admin account
- Complete the installation
# 1.2 Verify Installation
After installation:
- Log in to your WordPress admin dashboard (usually
http://yoursite.com/wp-admin) - Check that you can access the dashboard successfully
- Navigate to Settings → Permalinks and set to “Post name” (recommended)
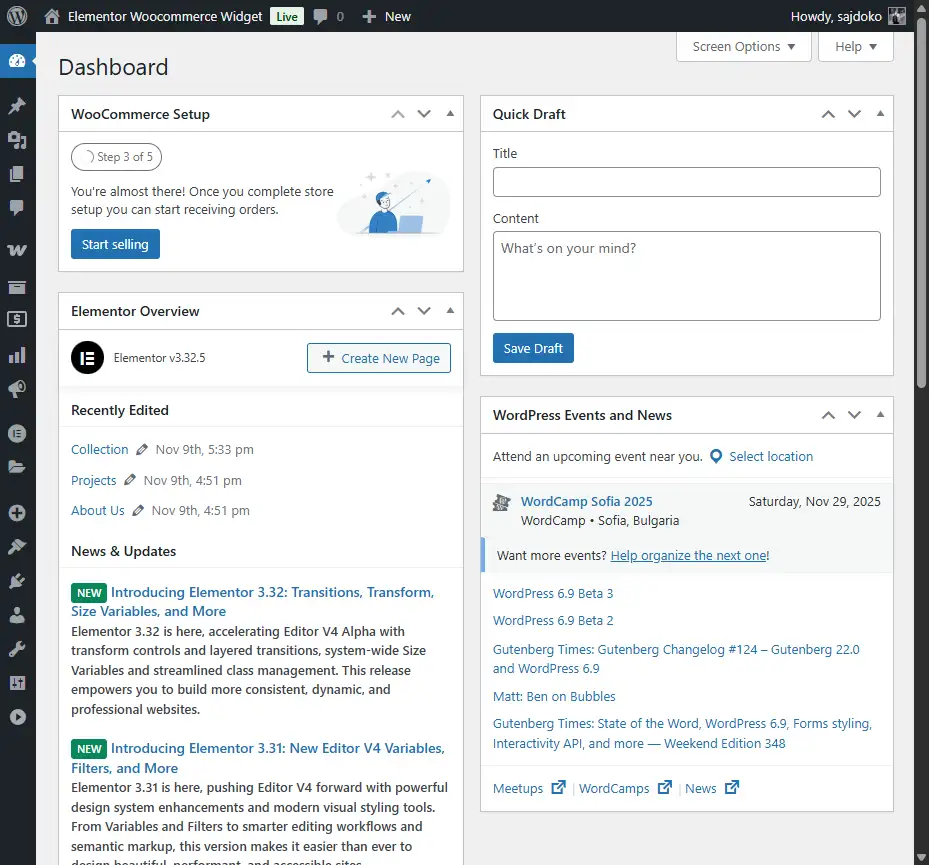
The WordPress admin dashboard after successful installation
# Step 2: Install Required Plugins
# 2.1 Install WooCommerce
WooCommerce is the e-commerce foundation for our widget.
- Go to Plugins → Add New
- Search for “WooCommerce”
- Click Install Now on the official WooCommerce plugin
- After installation, click Activate
- Follow the WooCommerce setup wizard:
- Choose your store location
- Select industry and product types
- Configure business details (you can skip this for development)
- Select a theme (we’ll install Hello Biz later)
- Complete the setup
# 2.2 Install Elementor
Elementor is the page builder we’ll extend with our custom widget.
- Go to Plugins → Add New
- Search for “Elementor”
- Click Install Now on the official Elementor plugin
- After installation, click Activate
- You may see a welcome screen – you can skip the introduction
Note: The free version of Elementor is sufficient for this tutorial. Elementor Pro is not required.
# 2.3 Verify Plugin Installation
Check that both plugins are active:
- Go to Plugins → Installed Plugins
- Verify both WooCommerce and Elementor show as “Active”
- You should see new menu items for both plugins in the admin sidebar
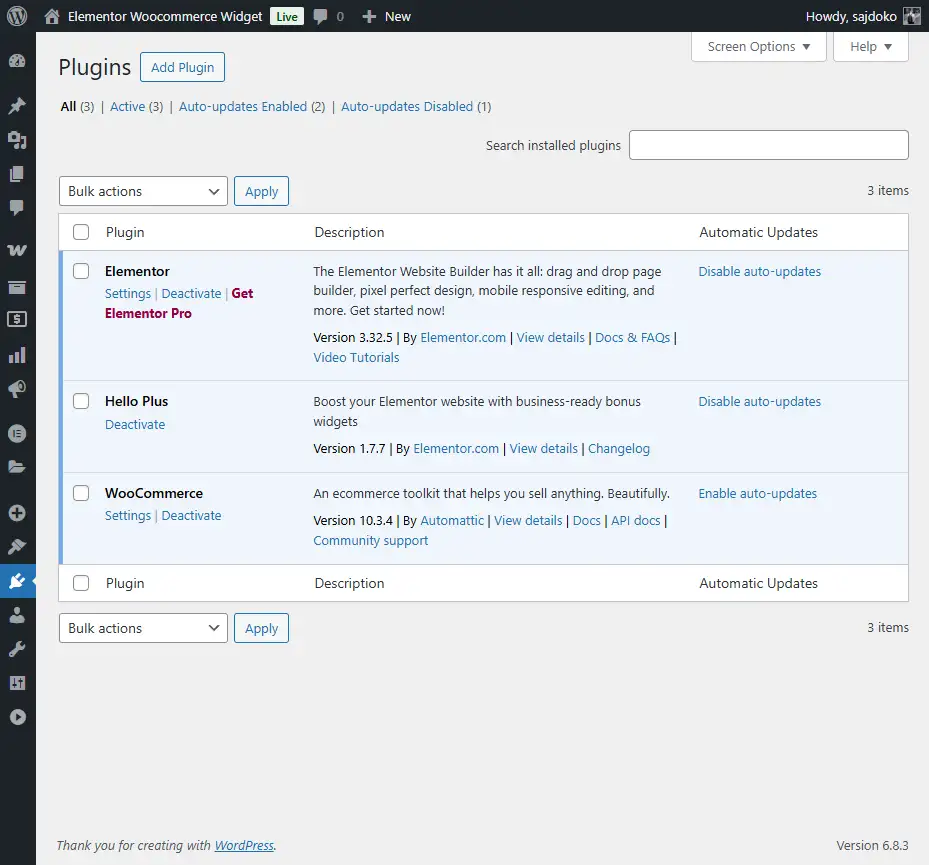
WooCommerce and Elementor plugins installed and active
# Step 3: Install Hello Biz Theme
# 3.1 Install the Parent Theme
Hello Biz is a lightweight theme optimized for Elementor.
- Go to Appearance → Themes
- Click Add New
- Search for “Hello Biz”
- Click Install on the Hello Biz theme
- After installation, click Activate
Alternative: If Hello Biz is not available in the repository, you can use “Hello Elementor” as an alternative parent theme.
# Step 4: Create a Child Theme
Creating a child theme is essential – it allows you to modify and extend the parent theme without losing changes when the parent theme updates.
We can download the Hello Biz theme from the Official Github repository: Hello Biz Child Theme, or you can create it manually.
# 4.1 Create Child Theme Directory
- Navigate to
wp-content/themes/on your WordPress installation - Create a new folder named
hello-biz-child
# 4.2 Create style.css
Create a file named style.css in the hello-biz-child folder with the following content:
/*
Theme Name: Hello Biz Child
Description: Child theme for Hello Biz with Collection Products widget
Author: Your Name
Author URI: https://yourwebsite.com
Template: hello-biz
Version: 1.0.0
License: GNU General Public License v3 or later
License URI: https://www.gnu.org/licenses/gpl-3.0.html
Text Domain: hello-biz-child
*/

/* Add your custom styles here */
Important: The Template: line must match the directory name of your parent theme exactly.
# 4.3 Create functions.php
Create a file named functions.php in the hello-biz-child folder:
/**
 * Theme functions and definitions.
 *
 * For additional information on potential customization options,
 * read the developers' documentation:
 *
 * @package HelloBizChild
 */

if ( ! defined( 'ABSPATH' ) ) {
	exit; // Exit if accessed directly.
}

define( 'HELLO_BIZ_CHILD_VERSION', '1.0.0' );

/**
 * Load child theme scripts & styles.
 *
 * @return void
 */
function hello_biz_child_scripts_styles() {

	wp_enqueue_style(
		'hello-biz-child-style',
		get_stylesheet_directory_uri() . '/style.css',
		[
			'theme', // This ensures parent theme styles load first
		],
		HELLO_BIZ_CHILD_VERSION
	);
}

add_action( 'wp_enqueue_scripts', 'hello_biz_child_scripts_styles', 20 );

// We'll add more code here in later tutorials
# 4.4 Activate Child Theme
- Go to Appearance → Themes in WordPress admin
- You should see “Hello Biz Child” theme
- Click Activate on the child theme
- Your site should now be using the child theme
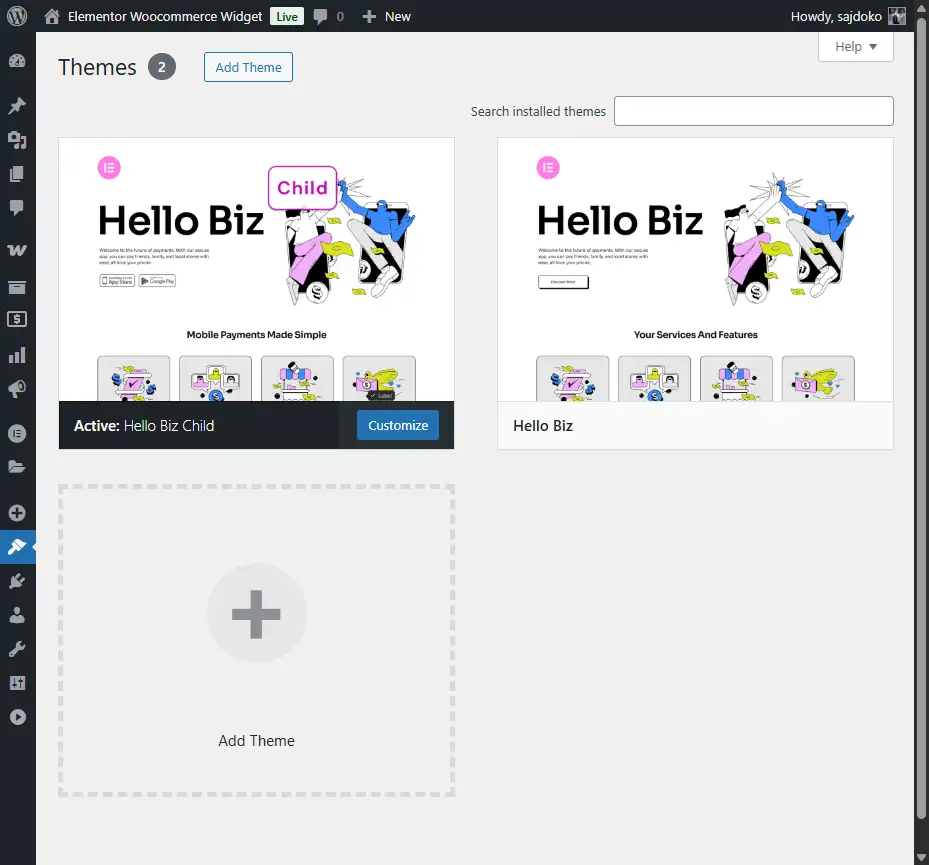
Hello Biz Child theme activated in WordPress
# Step 5: Create Widget Directory Structure
Now let’s set up the directory structure for our Collection Products widget.
# 5.1 Create Directories
In your hello-biz-child folder, create the following directories:
hello-biz-child/
├── widgets/
│   └── collection-products/
├── js/
└── css/
You can create these via FTP, File Manager, or command line:
Via Command Line:
cd wp-content/themes/hello-biz-child
mkdir -p widgets/collection-products
mkdir js
mkdir css
Via File Manager or FTP:
Simply create each folder manually.
# 5.2 Verify Directory Structure
Your child theme should now have this structure:
hello-biz-child/
├── functions.php
├── style.css
├── widgets/
│   └── collection-products/
├── js/
└── css/
# Step 6: Add Sample WooCommerce Products (Optional but Recommended)
To test our widget properly, let’s add some sample products.
# 6.1 Install WooCommerce Sample Data
- Go to WooCommerce → Status → Tools
- Click on “Create default WooCommerce pages” (if not already created)
- For sample products, you can:
- Install the “WooCommerce Sample Data” plugin, OR
- Manually create a few products
# 6.2 Create Sample Products Manually
If creating manually:
- Go to Products → Add New
- Create at least 9 products (to test the grid layout)
- For each product:
- Add a title and description
- Set a price
- Add a featured image
- Assign to a category
- Publish the product
# 6.3 Add Product Variations (for Color Swatches)
For testing color swatches:
- Create a Variable Product
- Add an attribute named “Color” (make it global attribute)
- Add color terms (e.g., “Black”, “White”, “Blue”)
- Create variations for each color
- Save the product
# Step 7: Test Your Setup
# 7.1 Verify WordPress
- Visit your site frontend
- Confirm the site loads without errors
- Check that the Hello Biz Child theme is active
# 7.2 Verify WooCommerce
- Go to Products → All Products
- Verify your sample products are listed
- Visit the Shop page on the frontend
- Confirm products display correctly
# 7.3 Verify Elementor
- Create a new page or edit an existing one
- Click “Edit with Elementor”
- Verify Elementor editor loads
- Check the widgets panel on the left
- You should see various Elementor widgets
# Common Issues and Solutions
# Issue 1: Child Theme Not Showing
Solution:
- Check that
style.csshas the correctTemplate:header matching the parent theme folder name - Verify both
style.cssandfunctions.phpexist in the child theme folder - Clear browser cache and WordPress cache
# Issue 2: Parent Theme Styles Not Loading
Solution:
- Ensure the parent theme handle in
wp_enqueue_style()is correct - Some themes use ‘theme-style’ or ‘hello-elementor’ – check your parent theme’s functions.php
- Adjust the dependency array accordingly
# Issue 3: WooCommerce Not Showing Products
Solution:
- Ensure products are published (not drafts)
- Check permalink settings (Settings → Permalinks, click Save)
- Verify WooCommerce pages were created (WooCommerce → Status)
# Issue 4: Elementor Editor Not Loading
Solution:
- Deactivate all plugins except Elementor and WooCommerce
- Switch to a default WordPress theme temporarily to isolate the issue
- Check browser console for JavaScript errors
- Clear WordPress cache and browser cache
# Testing Your Environment
To ensure everything is set up correctly, perform these checks:
# Checklist
- [ ] WordPress is installed and accessible
- [ ] You can log in to WordPress admin
- [ ] WooCommerce is active and configured
- [ ] Elementor is active
- [ ] Hello Biz parent theme is installed
- [ ] Hello Biz Child theme is active and working
- [ ] Directory structure is created (widgets/, js/, css/)
- [ ] Sample products are created in WooCommerce
- [ ] You can edit pages with Elementor
- [ ] WooCommerce shop page displays products
# Summary
The development environment now includes:
- WordPress installed and configured
- WooCommerce plugin activated with sample products
- Elementor plugin activated
- Hello Biz child theme created and activated
- Directory structure ready for widget development
# What’s Next?
In Part 2: Understanding Elementor Widget Architecture, we’ll examine the widget base class, required methods and lifecycle before building our widget.
# Additional Resources
- WordPress Child Themes Documentation
- WooCommerce Documentation
- Elementor Developers Documentation
- Local WordPress Development