Building a custom WordPress theme from scratch is a great way to fully understand how WordPress works. Whether you’re a developer looking to learn the intricacies of theme development or simply someone who wants to create a unique theme for your website, this guide will walk you through the process step by step.
Step 1: Set Up Your Development Environment
Before diving into theme development, you’ll need to set up a local WordPress development environment. This environment will allow you to work on your theme without affecting any live sites. Here’s what you need:
- XAMPP or MAMP to create a local server environment (How to Set Up WordPress on Localhost Using XAMPP: A Step-by-Step Guide).
- PHP and MySQL (bundled with XAMPP/MAMP).
- A code editor like Visual Studio Code or Sublime Text.
- A local WordPress installation, which you can download from wordpress.org.
Step 2: Create Your Theme Folder
Once your environment is set up, navigate to the /wp-content/themes/ directory in your WordPress installation. Create a new folder for your theme. You can name this folder anything you want (e.g., mytheme).
At the very minimum, your theme folder needs two files:
style.cssindex.php
style.css
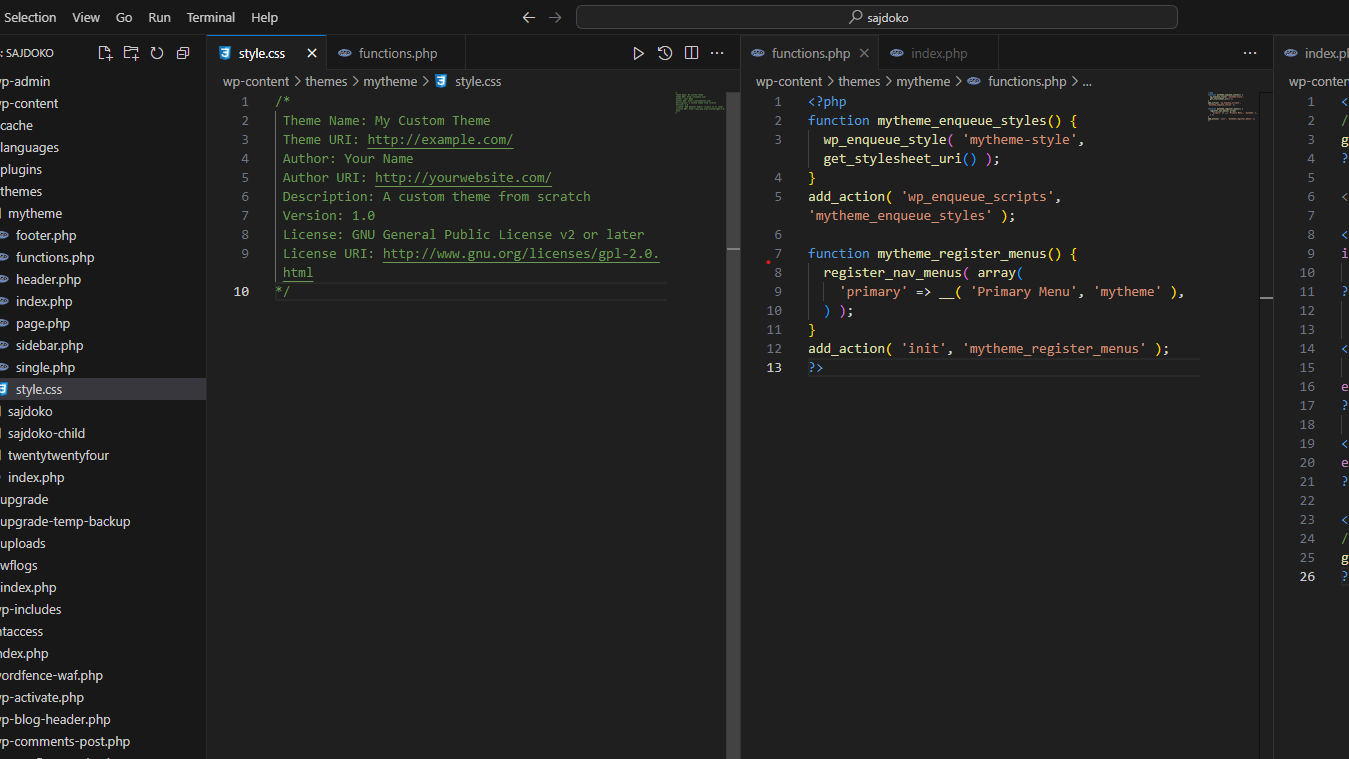
Your theme’s style.css file is more than just a stylesheet. It contains important information about your theme that WordPress uses to recognize it. Add the following comment block at the top of your style.css file:
/*
 Theme Name: My Custom Theme
 Theme URI: http://example.com/
 Author: Your Name
 Author URI: http://yourwebsite.com/
 Description: A custom theme from scratch
 Version: 1.0
 License: GNU General Public License v2 or later
 License URI: http://www.gnu.org/licenses/gpl-2.0.html
*/
Below this block, you can start writing your theme’s CSS styles.
index.php
The index.php file is the main template file for your theme. At the simplest level, it can contain a basic layout with a header and footer. Here’s an example:
<?php
// Include the header
get_header();
?>

<h1>Welcome to My Custom Theme</h1>

<?php
// Include the footer
get_footer();
?>
Step 3: Add Essential Template Files
To make your theme functional, you’ll want to add a few more important template files. These include the header.php, footer.php, and functions.php files.
header.php
The header.php file contains the head section of your theme and the opening HTML structure. Here’s an example of a basic header.php file:
<!DOCTYPE html>
<html <?php language_attributes(); ?>>
<head>
  <meta charset="<?php bloginfo( 'charset' ); ?>">
  <meta name="viewport" content="width=device-width, initial-scale=1.0">
  <title><?php wp_title(); ?></title>
  <?php wp_head(); ?>
</head>
<body <?php body_class(); ?>>
<header>
  <h1><?php bloginfo( 'name' ); ?></h1>
  <nav>
    <?php wp_nav_menu( array( 'theme_location' => 'primary' ) ); ?>
  </nav>
</header>
footer.php
The footer.php file contains the footer section of your theme. It closes out the HTML structure of your page:
<footer>
<p>© <?php echo date( 'Y' ); ?> <?php bloginfo( 'name' ); ?></p>
<?php wp_footer(); ?>
</footer>
</body>
</html>
functions.php
The functions.php file is where you add custom functionality to your theme. Here’s how to enqueue your stylesheet and register a navigation menu:
<?php
function mytheme_enqueue_styles() {
  wp_enqueue_style( 'mytheme-style', get_stylesheet_uri() );
}
add_action( 'wp_enqueue_scripts', 'mytheme_enqueue_styles' );

function mytheme_register_menus() {
  register_nav_menus( array(
    'primary' => __( 'Primary Menu', 'mytheme' ),
  ) );
}
add_action( 'init', 'mytheme_register_menus' );
?>
Step 4: Add The WordPress Loop
The WordPress Loop is used to display posts. In your index.php file, replace the placeholder text with a basic loop that will output your blog posts:
<?php
if ( have_posts() ) :
  while ( have_posts() ) : the_post();
?>
    <h2><?php the_title(); ?></h2>
    <div><?php the_content(); ?></div>
<?php
  endwhile;
else :
?>
    <p>No posts found.</p>
<?php
endif;
?>
Step 5: Add Templates for Posts and Pages
WordPress allows you to create different templates for posts and pages. Here’s how to create individual templates for blog posts and pages.
single.php
The single.php file is used to display individual blog posts. Create this file in your theme folder and add the following code:
<?php
get_header();

if ( have_posts() ) :
  while ( have_posts() ) : the_post();
?>
    <h1><?php the_title(); ?></h1>
    <div><?php the_content(); ?></div>
<?php
  endwhile;
endif;

get_footer();
?>
page.php
The page.php file handles individual WordPress pages. Create the file and add the following code:
<?php
get_header();

if ( have_posts() ) :
  while ( have_posts() ) : the_post();
?>
    <h1><?php the_title(); ?></h1>
    <div><?php the_content(); ?></div>
<?php
  endwhile;
endif;

get_footer();
?>
Step 6: Add More Customizations
Now that your theme is functional, you can start adding more customizations:
- Create a
sidebar.phpfile to add a sidebar. - Add templates for categories, tags, or archives (e.g.,
category.php). - Use the WordPress Customizer to allow users to make theme adjustments, or build support for Full Site Editing by creating a
theme.jsonfile.
Step 7: Test and Launch
Once your theme is ready, test it thoroughly in different browsers and on different devices. You can use debugging tools and performance plugins to check for issues. When you’re satisfied, upload your theme to your live WordPress site, and you’re all set!
Building a WordPress theme from scratch gives you full control over the design, functionality, and performance of your site. It’s a great learning experience and provides an opportunity to create something unique. By following the steps outlined in this guide, you’ll have a solid foundation for building your own theme. Happy coding!
