WordPress allows you to organize and display content in many different ways. One powerful feature is custom post types, which enable you to manage specific types of content like portfolios, services, products, or testimonials. However, to fully customize the look and feel of this content, you need to know how to create custom post type templates. This guide will walk you through the process of setting up custom templates for your post types to ensure they display exactly how you want.
Why Create Custom Post Type Templates?
By default, WordPress uses the same template for all post types, including custom ones, but sometimes you’ll want specific post types to have unique layouts. For instance, a ‘Services’ custom post type might require different styling than a regular blog post. Using custom templates, you can control the layout and structure of each custom post type and make sure the presentation matches the content type.
Step 1: Set Up Your Custom Post Type
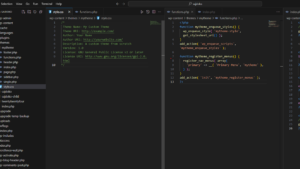
If you haven’t already created a custom post type, you’ll need to do that first. Here’s an example of how to register a custom post type using the sajdoko_register_post_type function in your theme’s functions.php file or a custom plugin:
// Register the 'Services' Custom Post Type
function sajdoko_register_services_post_type() {
    $labels = array(
        'name'               => 'Services',
        'singular_name'      => 'Service',
        'menu_name'          => 'Services',
        'name_admin_bar'     => 'Service',
        'add_new'            => 'Add New',
        'add_new_item'       => 'Add New Service',
        'edit_item'          => 'Edit Service',
        'new_item'           => 'New Service',
        'view_item'          => 'View Service',
        'all_items'          => 'All Services',
        'search_items'       => 'Search Services',
        'not_found'          => 'No services found.',
        'not_found_in_trash' => 'No services found in Trash.',
    );

    $args = array(
        'labels'             => $labels,
        'public'             => true,
        'has_archive'        => true,
        'supports'           => array( 'title', 'editor', 'thumbnail' ),
        'menu_icon'          => 'dashicons-hammer',
        'show_in_rest'       => true,
    );

    register_post_type( 'services', $args );
}

add_action( 'init', 'sajdoko_register_services_post_type' );
This will create a new post type called ‘Services’ that is ready to use. Once your custom post type is registered, we can move on to creating the templates for it.
Step 2: Creating Custom Post Type Templates
WordPress uses a hierarchy of template files to determine which one to use when displaying content. To create a template for a specific post type, you can create a new template file in your theme and name it according to the custom post type. For example, if you’ve created a ‘Services’ post type, you’ll need to create the following template files depending on how you want them to display:
- Archive Page Template:
archive-services.php - Single Post Template:
single-services.php
Let’s dive into each of these templates.
1. Archive Template: archive-services.php
The archive template is used to display a list of posts for a custom post type. For instance, if you have a ‘Services’ custom post type, the archive-services.php template will display a list of all services.
To create this template, navigate to your theme’s folder (typically located in wp-content/themes/your-theme/) and create a new file named archive-services.php. Then, add the following code:
<?php get_header(); ?>

<div class="services-archive">
    <h1>Our Services</h1>

    <?php if ( have_posts() ) : ?>
        <ul class="service-list">
            <?php while ( have_posts() ) : the_post(); ?>
                <li>
                    <a href="<?php the_permalink(); ?>"><?php the_title(); ?></a>
                    <p><?php the_excerpt(); ?></p>
                </li>
            <?php endwhile; ?>
        </ul>
    <?php else : ?>
        <p>No services found.</p>
    <?php endif; ?>
</div>

<?php get_footer(); ?>
This template will display a list of services with the title and an excerpt for each post. You can customize the HTML and CSS to match the design of your site.
2. Single Post Template: single-services.php
The single post template is used when viewing an individual post of your custom post type. For instance, if you click on a specific service, WordPress will load the single-services.php template to display the details of that service.
Like with the archive template, create a new file in your theme’s folder called single-services.php, and add the following code:
<?php get_header(); ?>

<div class="single-service">
    <h1><?php the_title(); ?></h1>

    <div class="service-content">
        <?php the_content(); ?>
    </div>

    <div class="service-meta">
        <p>Service Price: <?php echo esc_html( get_post_meta( get_the_ID(), '_service_price', true ) ); ?></p>
        <p>Duration: <?php echo esc_html( get_post_meta( get_the_ID(), '_service_duration', true ) ); ?> hours</p>
        <a href="<?php echo esc_url( get_post_meta( get_the_ID(), '_service_url', true ) ); ?>">Learn More</a>
    </div>
</div>

<?php get_footer(); ?>
This template will display the title, content, and any custom meta data associated with the service. You can add more fields and styling as needed.
Step 3: Customize the Template with CSS
Once your template files are set up, you’ll likely want to style them with CSS. WordPress will load your theme’s style.css file by default, so you can add your custom CSS there or in a dedicated stylesheet for your custom post type templates.
Here’s an example of some basic CSS for the archive page:
.services-archive h1 {
    font-size: 36px;
    margin-bottom: 20px;
}

.service-list li {
    margin-bottom: 15px;
}

.single-service {
    padding: 20px;
    border: 1px solid #ddd;
}
Feel free to style your custom templates to match your website’s theme and branding.
Step 4: Optional – Creating Custom Taxonomy Templates
If your custom post type uses custom taxonomies (for example, ‘Service Categories’), you can create templates for those as well. The naming convention for taxonomy templates follows this format:
taxonomy-{taxonomy}.php– For a specific taxonomytaxonomy-{taxonomy}-{term}.php– For a specific term in the taxonomy
For example, if you have a taxonomy called ‘service_category’, you would create a file called taxonomy-service_category.php to handle the layout for archive pages related to that taxonomy.
Creating custom templates for custom post types in WordPress allows you to have full control over how your content is displayed. By following the steps above, you can create archive and single post templates for any custom post type and style them to fit your website’s design. Additionally, you can extend this further by adding custom taxonomies and their own templates, making your WordPress site highly flexible and tailored to your specific needs.


