Throughout this series, a complete and functional Quick Note Manager plugin has been built from the ground up. The core features—admin management, AJAX-powered submissions, and frontend display via shortcodes—are all in place. The final stage of development involves polishing the plugin to ensure it is secure, visually appealing, and ready for distribution.
This concluding article will focus on three key areas. First, a final layer of polish will be added with custom CSS for both the admin and frontend components. Second, a comprehensive review of the security measures implemented throughout the series will be conducted, reinforcing best practices. Finally, the process of testing, debugging, and packaging the plugin for release, including the creation of a standard readme.txt file, will be detailed.
A Final Polish: Styling the Plugin
A well-styled plugin provides a better user experience and feels more professional. Styles should be added using the standard WordPress enqueueing system to ensure they are loaded correctly and without conflicts.
Enqueuing Frontend and Backend Stylesheets
Separate stylesheets should be used for the frontend and the admin area to keep concerns separate and avoid loading unnecessary code.
- Frontend Styles: For the shortcode and widget, a stylesheet can be enqueued using the
wp_enqueue_scriptshook. - Admin Styles: For the admin management page, the
admin_enqueue_scriptshook is used, along with the$hook_suffixcheck to ensure the styles only load on the plugin’s page.
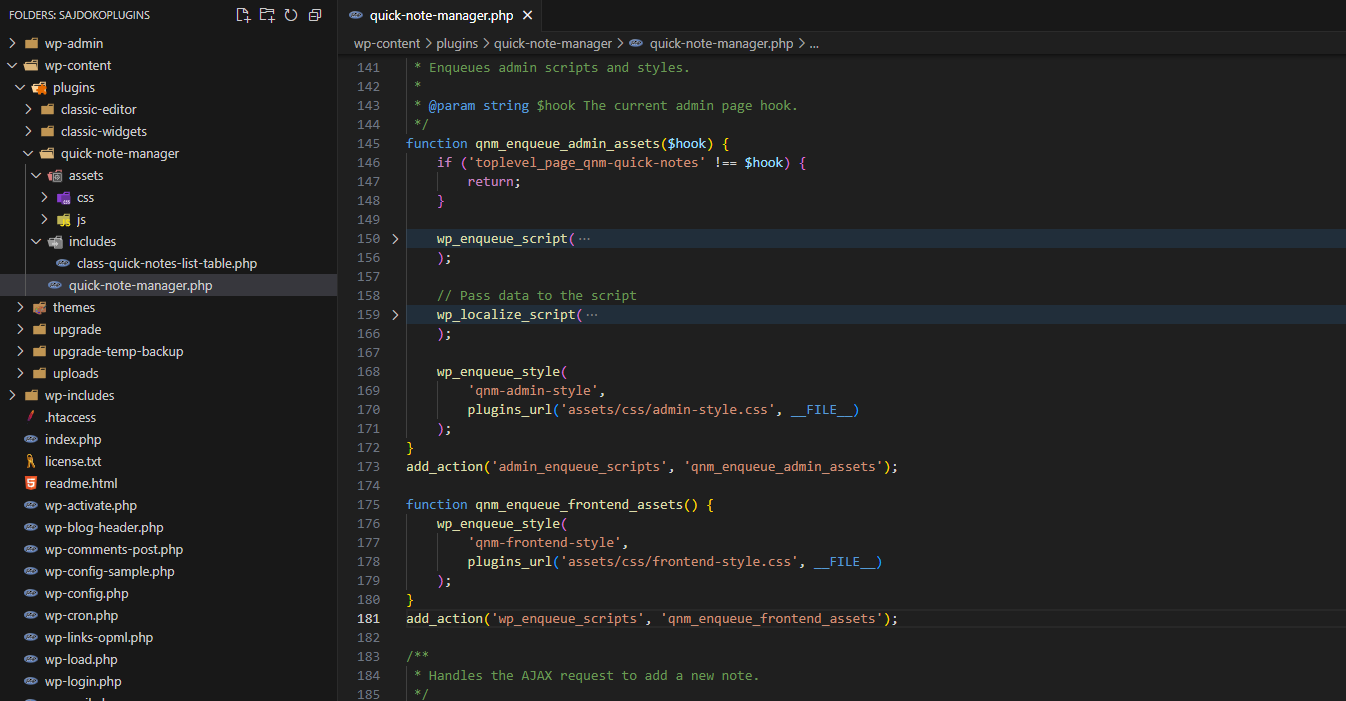
The qnm_enqueue_admin_assets function can be updated to include an admin stylesheet, and a new function can be created for the frontend.
// Update the admin enqueue function
function qnm_enqueue_admin_assets($hook) {
    if ('toplevel_page_qnm-quick-notes' !== $hook) {
        return;
    }
    //... existing wp_enqueue_script and wp_localize_script calls...
    wp_enqueue_style(
        'qnm-admin-style',
        plugins_url('assets/css/admin-style.css', __FILE__)
    );
}
add_action('admin_enqueue_scripts', 'qnm_enqueue_admin_assets');

// Add a new function for frontend styles
function qnm_enqueue_frontend_assets() {
    wp_enqueue_style(
        'qnm-frontend-style',
        plugins_url('assets/css/frontend-style.css', __FILE__)
    );
}
add_action('wp_enqueue_scripts', 'qnm_enqueue_frontend_assets');
Simple CSS rules can then be added to assets/css/admin-style.css and assets/css/frontend-style.css to improve the plugin’s appearance. For example, styling the unordered list generated by the shortcode.
Hardening the Plugin: A Security Checklist
Security is not an afterthought but a continuous process. This section serves as a final audit of the security practices that have been integrated into the plugin from the beginning.
- Data Validation and Sanitization: The principle of “Validate Early, Sanitize Late” has been applied. All data coming from the user—whether from a form submission or a widget setting—is cleaned before being saved to the database. Functions like
sanitize_textarea_field()for text andabsint()for numbers are used to strip potentially malicious code and ensure data integrity. - Output Escaping: All data retrieved from the database is escaped just before it is rendered on the screen. This is the most effective defense against XSS attacks. Functions like
esc_html(),esc_attr(), andesc_url()have been used consistently in theWP_List_Table, shortcode, and widget to ensure that stored data is displayed safely. - Nonces: Nonces (Numbers Used Once) have been used to protect all form submissions and AJAX requests from CSRF attacks. The combination of
wp_nonce_field()in forms,wp_create_nonce()for AJAX, and server-side verification withwp_verify_nonce()orcheck_ajax_referer()ensures that actions are performed only by the intended user from an authorized session. - Permissions (Capability Checks): Access to the plugin’s admin page and its data-modifying actions is restricted using
current_user_can('manage_options'). This ensures that only users with the appropriate permissions (Administrators) can manage the notes, preventing unauthorized access.
Testing and Debugging
Thorough testing is essential before releasing a plugin. WordPress provides built-in tools to aid in this process.
Enabling WP_DEBUG
During development, the WP_DEBUG constants in the wp-config.php file should be enabled.
define( 'WP_DEBUG', true );: This enables the main debug mode, which will show all PHP errors, notices, and warnings.define( 'WP_DEBUG_LOG', true );: This logs all errors to adebug.logfile in thewp-contentdirectory, which is useful for debugging AJAX requests or issues that don’t display on the screen.
These constants should always be set tofalseon a live production site to avoid exposing sensitive information.
Using Debugging Plugins
For more advanced debugging, plugins like Query Monitor and Debug Bar are invaluable. They provide detailed insights into database queries, hooks fired on a page, PHP errors, and script dependencies. These tools can help identify performance bottlenecks and complex bugs that are not immediately obvious.
Packaging the Plugin for Distribution
Once the plugin is stable and secure, it can be packaged for sharing or submission to the WordPress.org plugin directory.
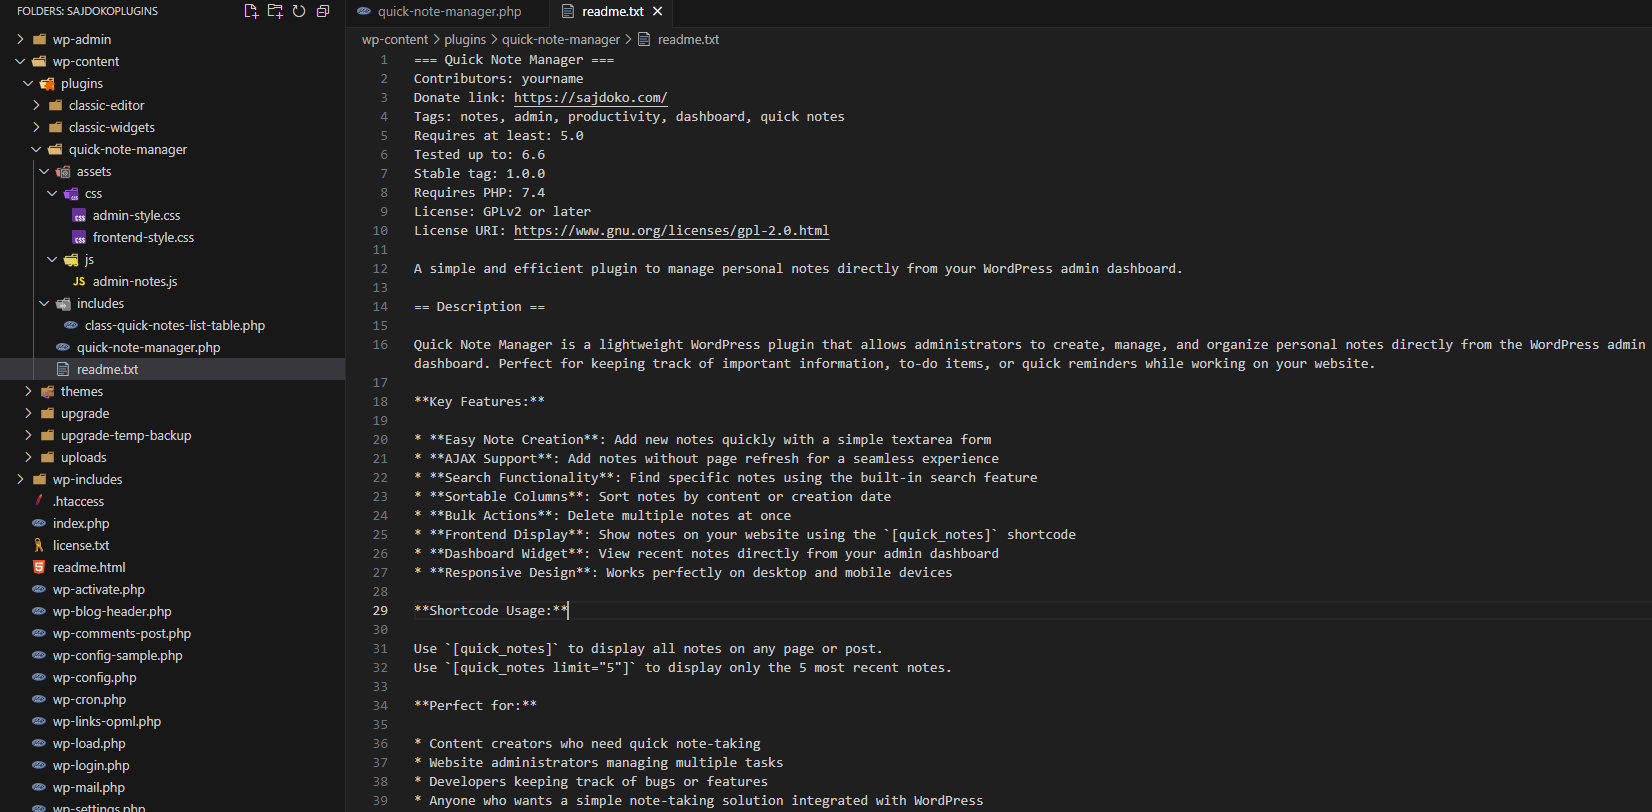
The Importance of readme.txt
A readme.txt file in the plugin’s root directory is critical. It is not just a help file; the WordPress.org repository parses it to generate the plugin’s public-facing page, including the description, installation instructions, FAQ, and changelog.
A standard readme.txt file follows a specific Markdown-like format and includes the following sections:
- Header: Contains metadata like Plugin Name, Contributors, Tags, Required and Tested WordPress versions, and License information.
- Description: A detailed explanation of what the plugin does.
- Installation: Step-by-step instructions for installation.
- Frequently Asked Questions (FAQ): Answers to common user questions.
- Screenshots: Descriptions for screenshots that will be displayed on the plugin page.
- Changelog: A version-by-version list of changes.
Final File Structure Review
A well-organized file structure makes the plugin easier to maintain. The final structure for the Quick Note Manager would look like this:
/quick-note-manager
|– assets/
| |– css/
| | |– admin-style.css
| | |– frontend-style.css
| |– js/
| | |– admin-notes.js
|– quick-note-manager.php
|– readme.txt
Creating the .zip File
To distribute the plugin, the entire quick-note-manager folder should be compressed into a .zip file. This file can then be uploaded to a WordPress site via the “Plugins > Add New > Upload Plugin” screen or submitted to the WordPress plugin repository.
Series Conclusion and Next Steps
This guide has walked through the complete process of building a WordPress plugin, from initial setup to final packaging. Along the way, it has covered essential aspects of the WordPress API, including plugin architecture, database interaction with $wpdb, creating admin pages with WP_List_Table, implementing secure AJAX, and leveraging the Shortcode APIs for frontend display.
The Quick Note Manager plugin is now a functional and secure tool. However, development is an iterative process. Potential future enhancements for developers to explore include:
- Adding an “Edit Note” functionality, likely via an AJAX-powered modal window.
- Implementing bulk actions in the
WP_List_Table(e.g., “Delete Selected”). - Adding categories or tags to notes for better organization, which would require extending the database schema and admin interface.
These challenges provide excellent opportunities to build upon the foundational skills acquired throughout this series.
You can find the complete source code for the Quick Note Manager plugin in the GitHub repository. Feel free to explore, fork, or contribute to the project to enhance your learning experience and help improve the plugin for the community!
Core Functions and Hooks Reference
The following table serves as a quick reference for the key WordPress functions, hooks, and classes used in this series.
| Function / Hook / Class | Type | Purpose | Covered In |
| register_activation_hook | Function | Runs code when the plugin is activated. | Article 1: Plugin’s Foundation |
| register_deactivation_hook | Function | Runs code when the plugin is deactivated. | Article 1: Plugin’s Foundation |
| $wpdb->prefix, $wpdb->insert | Property / Method | Interacts with the WordPress database safely. | Article 2: Admin UI |
| add_menu_page | Function | Adds a new top-level menu to the admin sidebar. | Article 2: Admin UI |
| admin_menu | Action Hook | The correct hook for adding admin menus. | Article 2: Admin UI |
| wp_nonce_field | Function | Adds a hidden nonce field to a form for security. | Article 2: Admin UI |
| check_admin_referer | Function | Verifies a nonce for a non-AJAX admin request. | Article 2: Admin UI |
| sanitize_textarea_field | Function | Cleans multi-line text input. | Article 2: Admin UI |
WP_List_Table |
Class | The base class for creating standard admin list tables. | Article 2: Admin UI |
| admin_enqueue_scripts | Action Hook | The correct hook for adding scripts/styles to admin pages. | Article 3: AJAX |
| wp_enqueue_script | Function | Adds a JavaScript file to a page. | Article 3: AJAX |
| wp_enqueue_style | Function | Adds a CSS stylesheet to a page. | Article 5: Styling |
| wp_localize_script | Function | Passes data from PHP to a JavaScript file. | Article 3: AJAX |
| wp_ajax_{action} | Action Hook | The hook for handling AJAX requests for logged-in users. | Article 3: AJAX |
| wp_send_json_success | Function | Sends a success response for an AJAX request and dies. | Article 3: AJAX |
| wp_send_json_error | Function | Sends an error response for an AJAX request and dies. | Article 3: AJAX |
| add_shortcode | Function | Registers a new shortcode and its handler function. | Article 4: Frontend |
| shortcode_atts | Function | Parses shortcode attributes against a set of defaults. | Article 4: Frontend |
| WP_Widget | Class | The base class for creating custom widgets. | Article 4: Frontend |
| register_widget | Function | Registers a new widget class. | Article 4: Frontend |
| widgets_init | Action Hook | The correct hook for registering widgets. | Article 4: Frontend |
| esc_html, esc_attr | Functions | Escapes data for safe output in HTML content and attributes. | Article 4: Frontend |
| current_user_can | Function | Checks if the current user has a specific capability. | Article 2: Admin UI |
